Tuesday, September 24, 2013

Silver Streak Bathroom- Continued

It took me a few days to get the bathroom put together...

Bath before:


Bathroom after:


Although it's far from finished- it's at least bright and a blank slate waiting for the fun!

I have decided to replace the faux marble laminate with something cheerful.  I'm still on the hunt for the perfect laminate but there's plenty to do until then!

The sink was a $5 Habitat for Humanity Restore find and and the faucet is a new purchase from Home Depot.


I couldn't find chrome replacement hardware with the same partial offset, so rather than hassle with it I just cleaned the original hardware with TSP Substitute, taped non-paintable parts and spray painted them white. I used Rustoleum 2x Glossy White. They just disappear into the white cabinets. 


I've picked out .032 Aluminum Sheets for the bath and kitchen backsplash, and the front end interior skin /seating area.

It's so hard waiting to add the fun pops of color in the curtains and bedding and upholstery!

Wednesday, September 18, 2013

Tackling the Silver Streak Bathroom and KISS: Keep It Simple Stupid


The last couple days I have been working feverishly on my new found obsession. And I'm not exaggerating. I wake up excited to get out there and get dirty. When life demands I do other responsible things I'm not real thrilled about it (sorry, that the fridge was empty kids and sorry to everyone that didn't receive a text or call back and if you want me to do something "fun"- check back in a few weeks). I spend my time after dark on Pinterest, Forums, RV supply shops and making lists of what to buy and what to do the next day. I'm really stressed this afternoon because I had to cut my project work time short to buy groceries and put checks in the bank. Boo-hoo right?

So, yesterday I dealt with this little challenge below.
WTF people.

So, what you are viewing is the backsplash of the bathroom sink area covered in sticky backed tiles and further held in place with plastic wood trim.


 I spent most of the day prying off the trim and using a blow dryer on hot to loosen the adhesive and pry it off, gently, with a chisel. To remove the mirror I taped the heck out of it to keep shards of glass from impaling me- keep that trick in mind.

So a shout out to all you 1980's remodel-ers and future generations of re-diyers, "KISS"!
Keep It Simple Stupid!

Your tastes will change, and paint is a lot easier to re-do than this kind of s*#t.


The wallpaper wasn't so bad. It came off in huge pieces and what was left I just dampened with a sponge and scraped of with a flat drywall/putty spatula.

Again, KISS!!! Why, oh, why? So much pattern and so much work.

I attempted to remove the rusty sink but I'll have to wait for the big guns to come home. I removed all but the hot /cold fittings underneath as they were not budging for me.


I next removed the hardware and cabinet fronts- I labeled the hardware and put it in little baggies.

If you are taking on a project like this- it is so important to photograph everything and label everything!

You will not remember every little detail of where and how everything fit back together and it's easy to lose items. Even items you don't think you will reuse need to be tagged and bagged. You can use parts as templates or pass them onto restorers. Most of these parts are not made anymore.

I wiped down all the surfaces to be painted, as sometimes wallpaper sizing causes crackling in paint. I also scufffed the door fronts with a light sanding.

Next I used Zinsser ,Waterbased Primer and Sealer, with a sponge roller for a smooth prime coat. It seals in stains and makes your paint coat stick. IMPORTANT STEP!
 I love this primer. It sticks to almost everything, self levels well and only requires 1 thin coat, repaintable in an hour. I use it in a lot of my furniture makeovers.


Here's everything prepped and ready for paint.
I am keeping the marble Formica, ordering brushed aluminum for backsplash and picking up a new white sink.

I don't think I'll get to paint until Friday as I have to do some real work. Yeah- the kind that pays the bills or my obsessions.

Tuesday, September 17, 2013

Silver Streak Redo: the beginning

Day 3 of our Silver Stream being home!

I was a bit disappointed to find the copious amounts of wallpaper were hiding water damage from leaking windows. But all in all the damage is minimal so far.

In a way it was a relief- now I don't feel confined to keeping it original, as all the front paneling must go and the rest of the veneer is damaged by the wallpaper.

The beginning:

Carpet and wallpaper removal.


Looking to back of trailer.


After paneling and insulation gone. Now assessing damage.


All windows need resealing.


2 small areas of floor rot require patching.


C channel needs reinforcement and body needs reattaching to frame in very front. 

All in all not too bad. I've seen a lot worse on the forums I've been following! 

Until the weekend I'll just continue with wallpaper removal and shopping for flooring and other modernizing options. 
Monday, September 16, 2013

Silver Streak Redo Ideas

For the week prior to the arrival of the Silver Streak trailer, I spent a lot of time perusing Pinterest gathering ideas for the redo, and forums for knowledge of potential nightmares and challenges.

Here is a picture of what the interior looked like in 1974 from the original brochure.


That was way funky!

So, I am torn- keep it original or make it bright light and modern?
Here are some of my favorite inspiration photos:

Keep it original?


Make it light, bright and modern?


Or classy and modern?


I guess I'll let my silver Stream dictate what I choose!

Want to see more fabulous and inspiring vintage travel trailer ideas?
Visit my Pinterest board:

1974 Silver Streak Continental Rocket Redo


I've wanted to redo a vintage travel trailer for awhile and time has come. I came across an ad in the 'Nickel Nik" for a '74 Silver Streak. The price seemed right and the next day we were on our way to Athena, Oregon a small town of 200 in Eastern, Oregon.

I'm a newbie to travel trailers so after a quick walk through and a few questions to Roger, the owner, I made an offer and said that we'd pick her up in a week.
( I'd put the cart before the horse since we didn't have a truck to haul it with.).


The following Sunday she was in our driveway. She got a good washing to remove moss and years of dirt. 

Of course, a huge storm hit that night and gave some of the dirt back.


Tune in for interior pics and progress in next blog post.....

Industrial Kitchen Chair

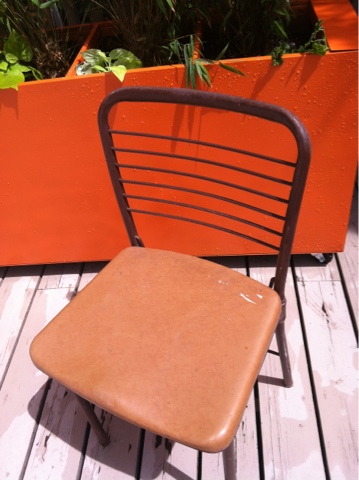
I was thoroughly disgusted that of all the junk bought from my yard sale that no one saw the potential beauty of my vintage kitchen folding chair, selling for the high price of $3. It was one of those projects I intended to get to but hadn't, so I thought a creative soul would swipe her up.
I was so peeved that I decided I had to show the world how cool she could be!

I had intended to recover the seat and paint the frame but when I asked the chair what she wanted to be (yes, I do ask my projects these kind of things and I don't know how gender is attached, but it's just how it is) and she shouted," INDUSTRIAL!". 
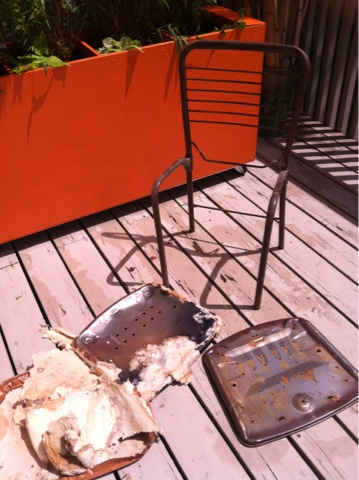
I stripped her down and cleaned off all the padding.
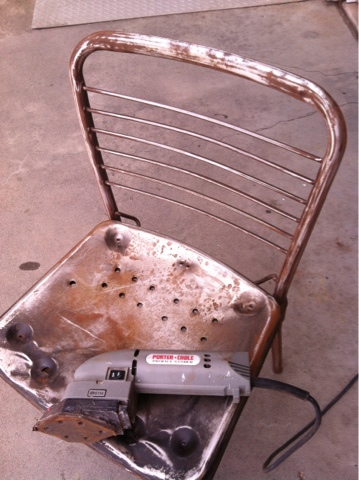
Under it all she had this fabulous patina. I further enhanced it by sanding some of the brown paint and exposing more metal throughout. 
A quick couple coats of Rustoleum protective gloss to keep her from rusting further and enhancing the colors and we were done!

The industrial cahair makes a nice contrast next to the modern cabinet from my earlier post!


File Cabinet Planter Box

Earlier this summer I was inspired by a Pinterest photo of a file cabinet made into a fabulous planter box.

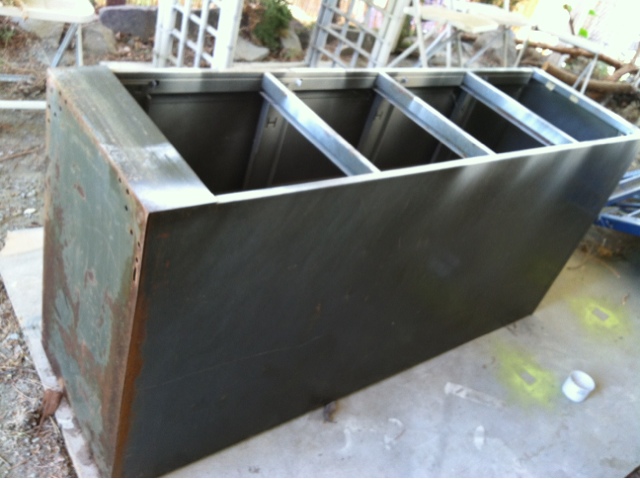
I set out to find a used heavy duty file cabinet and found one at a yard sale for $5!
It required a little sanding to smooth the surface and remove rust. I drilled holes in the bottom for drainage. A light rinse and it was time to paint.

It took 3 spray cans of Rustoleum white primer and 5 cans of Rustoleum Ultra Cover in a brilliant modern orange for exterior. I didn't do inside but probably would use a rust preventer spray for longevity next time.  
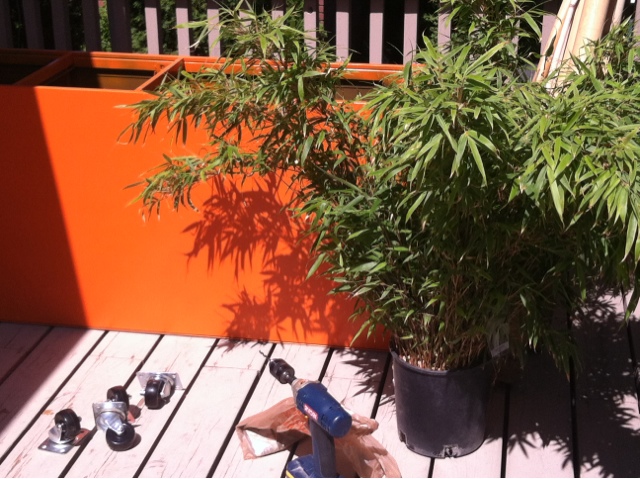
Next I pre- drilled holes and attached casters from Harbor Freight with screws, locking washers and a nut. Be sure to look inside prior to placement to make sure you can access the screws in the interior to put the washers and nuts on. 
Finished planter filled with bamboo, potato vine and nasturtium seeds.

To save $, I used one,1 gallon pot of bamboo and split it into 4 clumps with a serrated kitchen knife. It was too root bound and tough for a shovel. It does stress the plant and it will take a few months to a year for full recovery but if you've priced bamboo lately it's worth it. 

Total cost for planter $100.00.
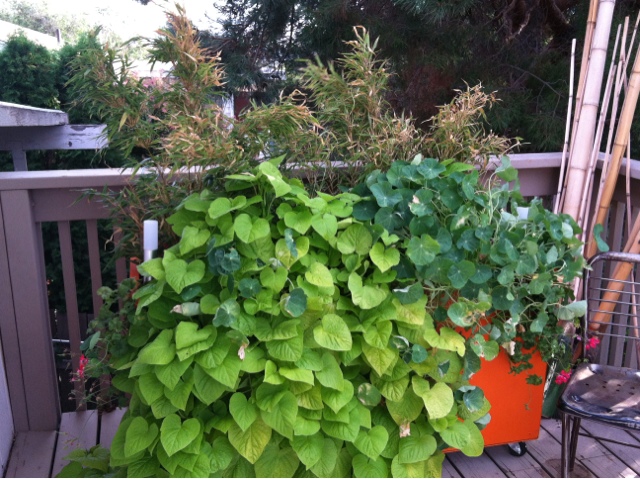
Finished planter at end of summer, looks a little ragged after several windstorms. 

Bamboo is still in recovery but potato vine and nasturtium did well!